Create an inventory schedule
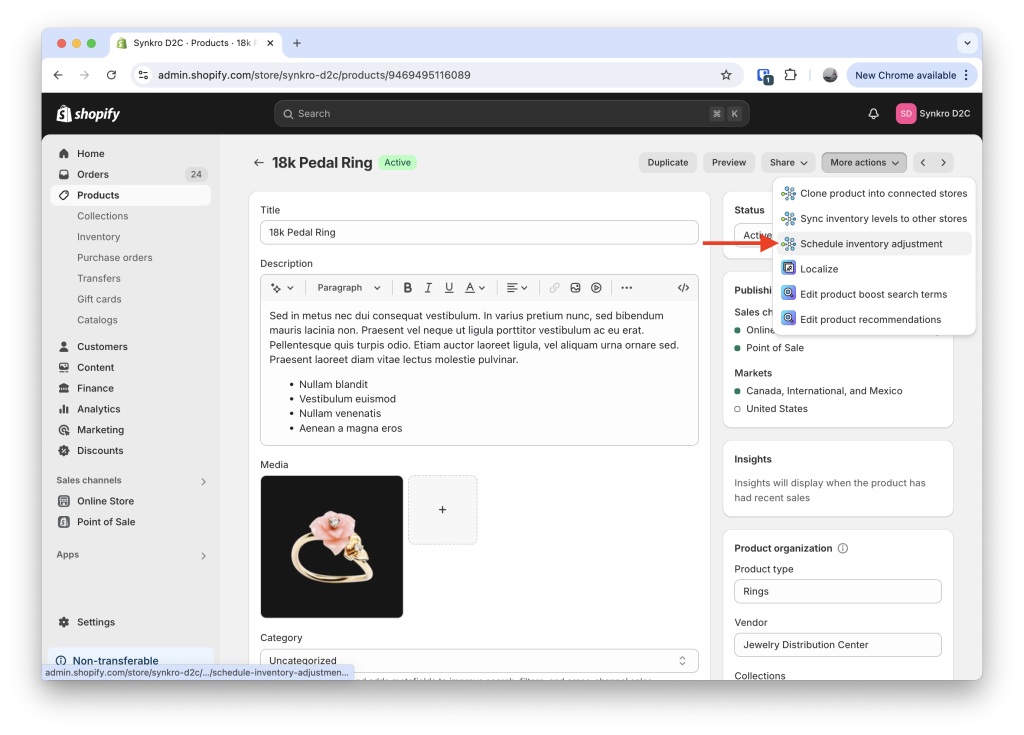
To create an inventory schedule, navigate within your Shopify Admin to the product for which you’d like to schedule an inventory adjustment. Click on “More actions”, then click “Schedule inventory adjustment”. You will be brought into the Synkro app and presented with a form which you can fill out with all of your inventory schedule details.

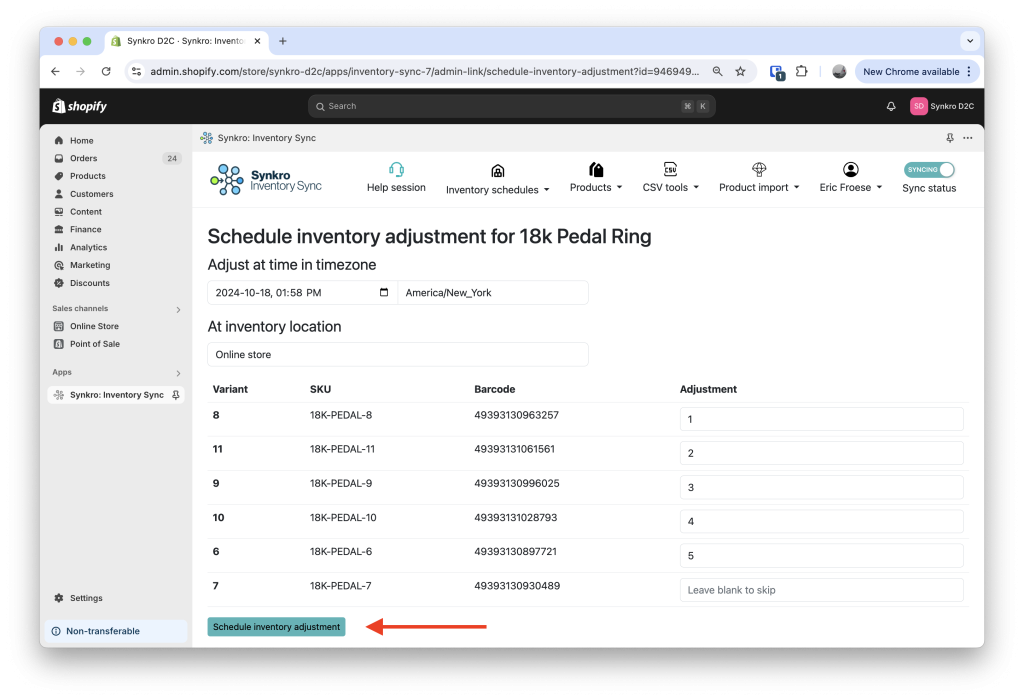
You must select a date and a time for the inventory adjustment, as well as a timezone and the inventory location which you’d like the adjustments to be made in. Then, enter the adjustment amounts for each variant which you’d like adjusted. This amount can be a positive or negative number, and you can leave the field blank for variants which you don’t want to adjust.

Congratulations 🚀 Synkro will adjust the inventory at the future time according to your specifications when creating the inventory adjustment schedule.
Manage inventory adjustment schedules
If you’d like to see the status of your inventory adjustment schedules, or cancel an inventory adjustment for a variant, you can navigate within the Synkro app to the “Schedule inventory” section. Here you will see a list of all your inventory adjustment schedules for each variant.

To cancel an inventory adjustment schedule, simply click “Cancel” beside the scheduled inventory adjustment.

